
In this article
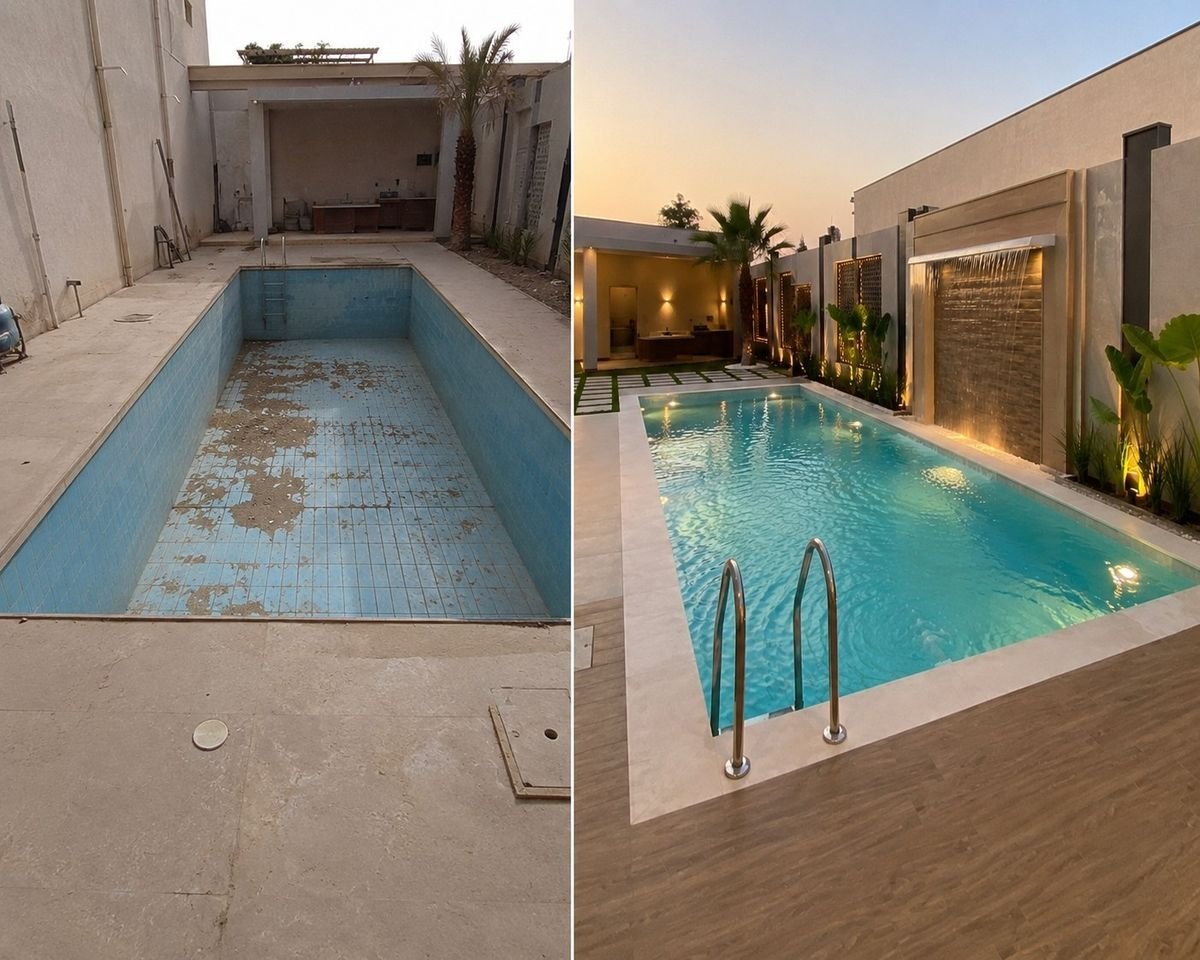
When you decide to renovate an old villa pool, the hardest part is often not the work but not knowing what comes next. When is the pool drained? When do you choose tiles? What must you approve before the crew continues? When is the job really finished?
This article is a project roadmap from the owner side. For each step we explain what happens, what you receive and what you approve before moving on. It keeps you in control without being a technician, and it applies in Riyadh and other Saudi cities.
Step one, inspection and diagnosis
A site visit checks tiles, cracks, deck and plant room, with leak tests if needed, to identify the cause rather than just describe the symptoms.
You receive a condition summary with photos and an initial diagnosis. You approve the renovation type, partial, full or phased. See inspecting a villa pool before renovation.
Step two, plan, design and quotation
This is the time for any change you want, because changes after work starts cause delay and cost. Consider tile colour or type, new steps or a bench, efficient lighting, a new pump and filter, and extra safety features for children.
You receive an itemised written quotation with materials, waterproofing and tile types, included equipment, a stage schedule and the written warranty. You approve the quotation and final design, ideally choosing tiles now if they need ordering time.
Step three, draining and preparation
The pool is drained after a site and soil assessment, with proper discharge, then cleaned and documented again. Old tiles and adhesive are removed and debris is cleared as work proceeds.
You receive photos of the concrete after tile removal and any plan update. You approve changes caused by what was found, before treatment starts.
Step four, concrete and waterproofing
- Treat cracks by type and protect any exposed steel.
- Repair weak concrete and level the surface.
- Detail corners, fittings and light niches.
- Apply the waterproofing in layers with proper drying times.
- Fill test and monitor the level before tiling.
You receive the fill test result, ideally seen in person. You approve moving to tiling only after it passes.
Step five, tiling and finish
- Straight tile lines and neat cuts at corners and steps.
- Slip-resistant tiles on steps and shallow areas.
- Smooth, safe coping edges.
- A flexible seal between coping and deck.
You receive a walk-through before filling to flag any tile or joint that needs adjusting.
Step six, equipment
Alongside or after tiling, the approved equipment is installed or serviced, including pump, filter and plant room pipes, lighting and electrics with proper protection by a qualified electrician, and suction and return fittings. For upgrade ideas, read about villa pool filtration and lighting upgrades.
Step seven, filling, start-up and handover
- Gradual filling once grout has cured.
- Start-up of circulation, filter and lights.
- Water balance with pH around 7.2 to 7.6, then chlorine.
- Level monitoring in the first days to confirm no leak.
- Written operating and care instructions.
You receive a working pool, instructions and the written warranty on workmanship and waterproofing.
After handover
Handover is not the end of the story. New materials are still settling in the early period, so a little care goes a long way.
- Log the water level at the same time each day for a while, so any issue shows up early and within the warranty.
- Keep the water balanced from day one, as unbalanced water can harm new grout before it fully hardens.
- Use suitable cleaning tools on new tiles and avoid metal brushes and harsh cleaners.
- Clean the skimmer and filter regularly, especially after the dust storms common in Riyadh.
- Keep the contract, quotation, photos and warranty together in one file.
A maintenance contract helps protect the result and catches issues before they grow. YAM Pools supports villa owners through every step, from site visit and written quotation, through engineering supervision of waterproofing, to handover, warranty and optional maintenance contracts.
Frequently asked questions
When should I choose tiles?
Ideally at the planning and quotation stage before draining, especially if the tiles need ordering time. A late choice can stop the work.
Do I need to be present at every step?
Not necessarily, but attend key points such as the inspection after tile removal, the fill test result and the walk-through before filling.
Can the plan change after work starts?
It can if something appears under the tiles that was not visible before. Any change should be presented to you and approved before it is carried out.
What should I do in the first days after handover?
Watch the water level, follow the water balance instructions and avoid harsh cleaning tools on new tiles. Report anything early.